What It Takes To Succeed At Exterior Wall Surface Preparation for Painting
If you are preparing to paint the exterior of your house, it makes really good sense to do your research. Try to really understand what you need to do to make sure that when you have completed the painting job, the good results will last for years without having to make repairs or do repainting because you have overlooked something.
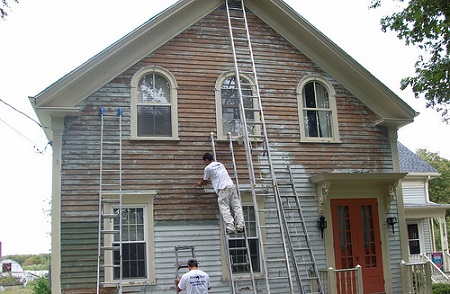
Patience and attention to detail is the name of the game and if you follow each of the practical steps listed below you can be sure that you are making as sure as possible that you will have done a great job at preparing the walls for painting, as this advice is given by expert house painters in Aurora who fully understand what needs to be done.
Understanding your exterior surface
Take a walk around your property and examine the walls closely, take note of any particular repair work you may need to carry out before painting. Obviously there are many different exterior finishes to buildings and also material used. The cleaning methods you adopt need to take these materials into consideration, for example how you clean brickwork or a stone finish is very different to how you treat wood.
Cleaning the exterior surface
Keep in mind that you must prepare a clean surface to do a good paint job. Dirt, mould and moss needs to be removed. To complete this task properly you should have a hose and pressure washer on hand together with a reservoir attachment that contains detergent to make the wall cleaning more effective.
Test out the nozzle attachment so that you become familiar with how to handle it properly before you get down to work. The stream needs to be sufficiently powerful to wash off dirt and grime, but if it is too powerful it can cause damage to wood and the water can seep under lap boarding and even break windows if you don’t pay attention.
Some parts of your exterior walls will not need pressure hosing should the paintwork be intact. Simply use a normal hosepipe and a stiff brush to wash and scrub the dirt off the walls. Mildew and moss needs special attention because if it is not correctly dealt with and removed it will probably reappear after you have finished painting. If you are not sure ask an expert at the paint shop to advise you of a suitable safe cleaning agent that can be mixed with bleach to do an effective job. Don’t forget once you have completed the cleaning that you hose the walls down completely to wash away all the debris.
Scraping away the paint
Having completed the washing down, you need to get to work on flaking and loose paint. The best tools to use are a tough wire brush, and a set of scrapers with different heads that allow you get even into tight corners. You don’t need to scrape all the paint off down to the bare wood, just scrape away the paint until you get to sound paint that is intact. Make sure you sand the paint work and wood down to make sure you have a smooth but sanded surface that will allow the new paint to grip the walls securely, you can use a sanding block or a wood sanding machine to complete this phase of your preparation.
Removing the loose cladding
If your walls are treated with a stone mix cladding and it has become cracked or damaged, you need to make sure all the loose cladding is removed. If left alone, there is the risk that rainwater can seep in and cause greater damage. Mix a filler compound that you can use to fill holes or cracks and allow a couple of days to allow this to dry before painting. It makes good sense to check the weather forecast to see when a two day dry period is likely to occur so you can plan your filling repair work around this information.
Getting rid of the old putty
Now is the time to get rid of the old putty. Check carefully around doors and windows and use a tough scraper to remove the old putty completely. Next prepare the new putty and apply it using a putty trowel, make sure that you apply the putty carefully and don’t leave any gaps. A good tip is to have a bowl or cup of water to hand so that you can smooth the putty with a dampened finger to make the finish as perfect as possible.
Replacing the old caulking
Next, remove old or damaged caulking from around doors and windows, replace the caulking carefully with new caulking, paying great attention to not leave any gaps.
Protecting your lawn
Last but not least, you need to turn your attention to your garden plants, use drop cloths to protect the flower beds and tie back any bushes that are close to the walls to avoid damage. Once you are done, you are ready to start your painting job for your exterior walls!