You Should Make It A Priority To Store Paint In A Safe Manner!

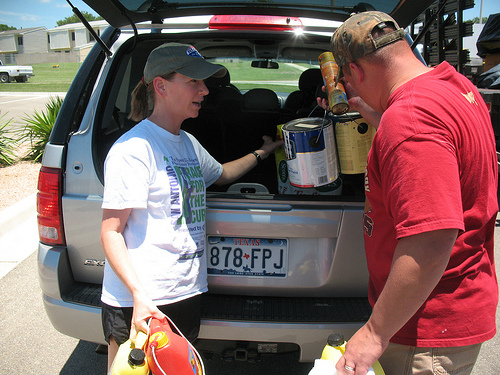
It does not matter whether you are living alone or with kids or have pets at home, it is highly important that you store your paint in a proper manner. You should store paint well and make sure the paint cannot be easily accessed by the children and pets. There are times when people simply pop the lid of the paint back on and place it in the basement or attic and forget about it till the time they need to use it again. And then when you plan to paint your house, you spend the entire day in rummaging for the paint boxes, then fiddle with the lid for the next half an hour and God knows what you find when you finally manage to open the can successfully.

Safe paint storage is not just about keeping yourself and your loved ones safe from any kind of hazard but it is about storing it such a way that you can use it in the near future as well. Here are a few things that you must consider when storing paints in your home.
4453375841_1553d21f2a

Composition of paint and how it becomes hazardous

Paints generally have four components namely, solvent, additives, pigment and resin. Following is a description of each of the components:

• Solvent

This is the ingredient that keeps the paint in its liquid form. The paint only gets dried or lumpy when the solvent has evaporated from the paint. Solvent is made with petroleum distillate. The hazardous elements ingredients in the solvent include mineral spirit, xylene and toluene. In latex paint, water is the main solvent ingredient.

• Resin

Resin happens to the prime ingredient of paint. It is the cover or the film that is created when you coat an object with paint. Although resin itself is considered to be nonhazardous, it can become dangerous when other ingredients are added. The basic ingredients of resin include acrylic, synthetic or linseed.

• Pigments

It is because of the pigments, the color in each can of paint is created. This is not it; pigments tend to crease the covering power of paint and the opacity of paint at the same time. The prime ingredients of pigments include iron oxide, titanium oxide, calcium sulfate, silicates and clay. Generally these types of pigments are considered to be nonhazardous but when cadmium and arsenic is added, it becomes toxic for pets and people.

• Addictives

There are some paints in which special stabilizers are added. This is done to protect the paint from becoming dry in the can. These additives are also used for assisting in paint coating and for keeping the paint thick. The chemicals and ingredients that create these factors may have some hazardous or non hazardous material in them.

For instance, latex paint has mercury based fungicide preservative that is added to prevent the can becoming dry when stored. It also keeps away certain types of mold as well. Mercury happens to be quite toxic. Most of the paints that contain mercury are only designed for outdoor use. If you have a mercury paint solution to paint, it is very important that you never use it indoors.

A word on lead paint

Lead paints were used in seventies as they were quite common. If you ever come across lead paint in your store, do not ever use it. Simply throw it away and get yourself some new paint. If you are not sure whether the paint you have has lead or not, the easiest thing you can do is to contact a residential painter or the local health department and ask them. Lead is quite poisonous not only when you breathe but can lead to lethal results when touched.

How to check if the paint is useable or not

If you have a can of paint in your store and you want to know whether it can be used, it is quite easy to figure it out. You just need to open the can and stir it up. If upon stirring you see that the paint has the consistency of scrambled eggs or you see that the oil and paint will not mix together, then you must throw the can away.

Oil based paints can easily last for almost fifteen years, if stored properly. Similarly, latex paint can be easily kept for ten years or so but they should not have been previously frozen or thawed. Otherwise, they will be in a bad shape when you use them.

Tips for storing paint

By following a few simple steps, you can store your paint cans for a long period of time:

• Take plastic and put it over the lips and mouth of the can. Just ensure that there is no paint in the lips of the can. Place the lid over the plastic wrap.

• Always remember to store the paint in upside down manner. This way, air will not get into the can that will later create bubble and dry the paint.

• Always store the cans in dry area.
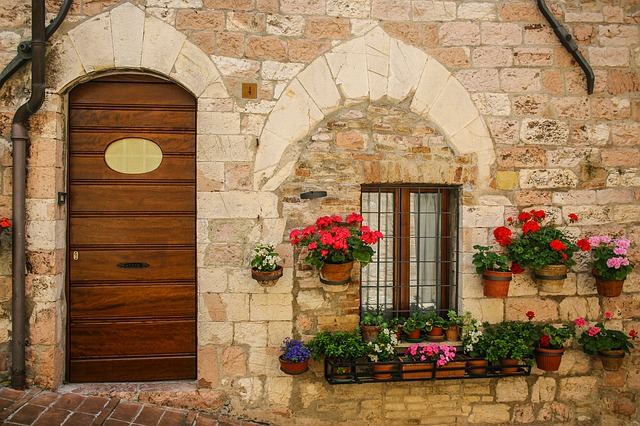
What It Takes To Paint A Brick House Exterior

Like cars and gardens, houses need makeovers at one point or another. Over time, they succumb to old age. Colors then fade and the houses start looking, old, dull and ugly. The external walls get exposed to weather changes like too much sun and rain. In a nutshell, you have to repaint the walls. But just how do you go about it when what you have on your wall are bricks? Do you just repaint like you would on a normal concrete wall? Certainly not. Here’s how to go about it.

236e0f0b2df284fcc4cacdf1_640-4

Use mild solutions

That is, refrain from using any acidic cleaning solutions. Refrain too from using hard bristled brushes on the bricks. Acid cleaning solutions may seem to offer the best solution. The long term effect is however much more devastating. The structural integrity of the bricks may be compromised. That is mainly because, bricks are naturally porous. The acid will with time ‘eat up’ the brick especially when it rains and water dilutes the acid laced up in the bricks.

Acrylic latex and elastodynamic paints

They are ideal on bricks for pretty much obvious reasons. Elastodynamic paints are water repellant. That means they can keep your bricks safe during extreme weather conditions, especially when it floods. It is also dense with high elasticity. It can easily fill pores and cracks on the surface and secure your bricks. Acrylic latex paints are also ideal. They are moisture resistant, which means they cannot allow mold or mildew to form on your brick walls. They are also extremely adhesive and durable.

The procedure

Make sure you have everything needed before you get started. That is, the right tools and equipment. You will need a pressure washer, plastic sheets, newspapers, stiff bristled brushes, caulk and scrapers. Start off by cleaning the bricks with water. Be sure to use a pressure water that can let out 1000 to 2000 PSI. You will need that amount of water force to help you get rid of stubborn dirt residues from your wall. To cover maximum area and save time, spray the water from left to right or from top to bottom. For tough stains, use hard bristled brushes and some amount of soap.

Cover your valuables

This is where old newspapers come in handy. Cover everything you do not need to paint, from your windows and doors to flower beds and window seals. Secure the areas with a painter’s masking tape. Be keen on electrical outlets. A smart move is to remove any electrical fitting or appliance until you are done with painting.

Cleaning cracks

Use a scrapper to do this. Examine your bricks for cracks then clean them before filling them. Widen the cracks a little before you can fill them with caulk. Be sure to use pesticides if you suspect they made a home in the cracks. For fillers, use 100% acrylic caulking. You may need a caulk gun to fill all gaps and cracks with ease. The gun will go a long way to help you fill even the tiniest gaps and cracks. Allow the filling to dry off completely before you can apply primer.

Applying the primer

Give your bricks a wash of primer before painting. The primer will create a smooth surface, make your work easier and help you come up with aesthetically appealing color schemes. The primer will also give your wall extra protection. Again, you have to be patient after applying primer. Let it dry completely before painting the bricks.

Painting the bricks

Apply your desired paint with a roller, paint brush or paint sprayers. Then while painting, use the right painting technique and stick to a direction of progress. The best way to go about this is to paint the bricks from right to left. The trick is to ensure similar paint strokes on the bricks. Remember to overlap the already painted bricks as you move from one side to the other. This will ensure you cover a bigger surface with ease and avoid ending up with uneven paint shades.

Regarding what to use between rollers, paint brushes or paint sprayers, don’t be afraid to use all of them. Remove areas may force you to use brushes. Some color schemes may force you to either go for the sprayer or roller.

Seeking expert assistance

This is where most homeowners have failed to see the truth when it comes to painting. The truth is, painting your home may be a Do It Yourself project, but you won’t be able to execute certain paint patterns and color schemes on your own. Your best bet is therefore to seek expert assistance for painting your house exteriors.

A good exterior painting expert should examine your bricks, take into account your budget and even the weather around your neighborhood. The expert will then advise you accordingly on which paint to use. The expert will even factor in your house design and recommend exterior painting ideas that will match your house’s exterior surface. With so many specialty skills to gain, you should certainly trust exterior painting contractors in Toronto!

Why You Should Not Paint Your House Exteriors In Fall

There are many people who think that there is nothing wrong with painting the outside of their house during the fall season. They believe that the weather is ideal for working outside because it is neither too hot nor too humid and therefore exterior painting can be an ideal pursuit. However, this is not the right approach.

Many professional companies that provide painting services are against painting the exterior of a house in the fall. They claim that this is one of the most common mistakes people make. In some regions, the companies do not schedule any exterior paint job when October begins. This is because low temperatures can have adverse affect on exterior paints because they set and dry.

If you are renovating your home then there is a high chance that you have allocated a special budget for residential painting. If so, it is important that you make the most of your money that you plan to invest on this paint project. If you get your house painted in fall, the paint job might not last for a long time.

After a year or two, you will see paint flaking off from the walls and cracking and peeling will be visible. You will be left with no other option but to paint your house again. When people find they that they would have to reinvest the money on paint, they end up repairing the ‘failed-area’ and just touch up with the same color that was used earlier. Obviously, the result of such repair is not extraordinary and one can easily see a difference in shades due to weathering and fading overtime.

3690435031_c12d1f7e0d-3

Role of temperature

If you ever get a chance to read the paint labels, you will find that they have clearly states the ideal temperature range recommended for you to apply the paint. Generally, the bottom line is set on fifty to fifty-five degrees Fahrenheit. Although paint quality has improved over the period of time, and you may feel that purchasing high quality paints will be enable you to paint your house in low temperature season as well. However, what must be realized is the fact that there is always a risk involved.

Once you have chosen any of the premium paints, you will see that they have their own requirements when it comes to paint application. The paint manufacturers have defined their ‘best hours of application’ and you should remain cautious about it. Ignoring this will simply put you in more trouble.

You must remember that paint does not only need drying time but there is a chemical reaction that has to take place. Hence, you must give that paint job proper time to complete. There are times when the paint has to be applied in the evening which means that the paint will dry at night. During fall season, the temperature can get quite low at times. A proper chemical reaction of the paint can only take place when the temperature is higher, at least around the room temperature.

Chemical reaction

The scientific reason lies in the bonding and drying of paint. There are two things that happen when paint is applied. At first, the vehicle (whether oil or latex) evaporates when the paint is set to dry. The drying process can be slowed when the temperature is low. However, this does not pose any problem.

The second thing that must be addressed is the chemical reaction that takes place within the paint. There are a number of chemicals in the paint and there are some catalysts that expedite the overall process. The polymers are to be formed from paint resin. Molecules are rearranged and the polymers end as chains of single molecules. This chemical reaction cannot take place in the low temperature.

Other reasons for painting failures in fall

There are several other reasons that compel that make it difficult to initiate the residential painting project in fall. There are some windows that need special type of putty (the glazing compound). Generally, putty needs a lot of time to dry primarily because it is very thick. It needs a warm temperature so that it can be dried and cured properly.

In low temperatures, it can crack and you will have to remove it and later replace it. There are times when people do not wait for the putty to dry. By doing so, the moisture that has to escape from putty passes through the layer of paint and as a result both fail. In order to attain the best results, you will also have to go for a lot of latex caulk. It must be remembered that caulk too needs a high temperature to cure and dry. Same is the case with primers because they do well in warm temperature as well.

What type of painting jobs is ideal for the fall season then?

Though painting the house exteriors is not recommended during the fall season, there are still other painting projects you can embark on.

• You can spray paint any metal lawn furniture. If you start in the morning, you can easily give them sufficient time to dry.

• Fall is still ideal for painting indoors. During this season, you can easily keep the windows opened for ventilation and allow the paint to dry. Well, some would say that the cool temperature of fall is a lot better than the hot temperature of summer!

What You Cannot Afford To Ignore When Painting Your Home’s Exteriors

So, you have finally made up your mind to get started on that home exterior painting project you have always been contemplating on. You have everything ready. You’ve hired the most experienced exterior painting service providers, invested in quality paints and set aside time off your busy schedule to ensure you can easily supervise the problem.

To a large extent, you are certain nothing will go amiss. Well, don’t be so sure! The worst can happen when you least expect. Not because you didn’t make room for dealing with the unexpected event but because you simply ignored a few basics. So with that in mind, be extremely keen on the following areas as you paint your house’s exterior surfaces.

4729909285_818502941b-2

The roof

You may not have noticed it yet but the roof is always the most visible part of any home. It has to be aesthetically appealing. That mean painting it or any of its fixtures is a preserve of someone who understands the intricacies of exterior painting. The whole process goes beyond just choosing colors for the roof that can blend the walls. First off, you have to ensure the roof fixtures get painted. That is, the chimneys, skylights and sun beam tunnels should not in any way be damaged by the painting process. Paint the chimney in a color that blends well with the walls. As for the skylights and sunbeam tunnels, the least you can do is to ensure they are well protected from stains and damage during the project.

Windows

Windows are pretty much like your roof as far as visibility is concerned. Painting the window is also tricky just as it is often the case with the roof. What most painters don’t know is the fact that your window pane and window seal don’t have to match. You can always go for a blend of light colors or even dark ones depending on the type of your house or the theme you want to execute.

Doors

They come in different shapes and sizes. Not so with the color. You decide the color. You change it when you want to. That may sound easy, but it isn’t. More often than not, coming up with the right color for the door is often tricky. That is mainly because you have to consider other factors like the door type, door frame and even the knobs. One color may be ideal for your garage door but not ideal for the main door. What’s more, you have to go for a color that will be easy on your home’s interior as well as exterior. The last thing you would want is a blue door on the inside and a green one on the outside.

Patio and balcony

Any place where you wish to entertain yourself or your guests should be welcoming. It should also be easy on the eyes. That is why you are allowed to go for a different color for your patio and balcony. This happens to be a new trend, but a good one all the same. Don’t be afraid to explore your creativity here.

Textures

This is where things often get tricky. Painting textures is never an easy thing. It is in fact, one area that often calls for experts. You can’t paint on a texture. You simply come up with the texture. Do not at any point think it is a matter of adding some paint to the sand or purchasing the right texture products. Executing the whole idea is often an uphill task. The best you can do is to let a professional do it for you with the right painting techniques as well as the appropriate color.

Outdoor furniture

It is easy to ignore them but they also count. They may not be as demanding as other areas are, but make no mistake about it. A simple mishap such as the wrong choice of color can easily ruin the external appearance of your home. So be sure to go for the ‘mix and match’ effect. The best way to go about painting the furniture is to match them with the roof color. You may also consider matching them with your doors and windows. Then while at it, be sure to also consider siding as well as your flower pots.

The paint

The paint you choose to use for the project can easily determine the entire project’s success or failure. Your exterior painting contractor will tell you for a fact that technology advancements have impacted house painting today in a good way. You can buy paints that don’t require you to apply primer or undercoat. You can also buy paint that can dry within a day. Better yet, you can buy eco-friendly and side effect free paints. Well, choosing can be hard, but with expert residential painters in Toronto by your side, making an informed decision on what to go for should be a breeze!

9 Things You Need To Know Before Your Home Exterior Painting Project Begins

Exterior painting is not one of those things you wake up to, roll up your sleeves and start doing. It is a delicate project. It calls for a fine taste of colors and real painting skills. It also calls for patience and attention to detail. You will have to stand for hours to execute ideas and see them metamorphose into fruition. But that is not enough. You must also take into account a few factors that will facilitate a smooth painting process. These factors often include:

4526774762_e4487b7acb-1

Mother Nature might not be your friend

There is no two way about it. You just have to take into account the weather patterns of your town or city. Select a time of the year when the weather is extremely friendly. That is, there should be little or no rain and low humidity. The reason behind this is pretty much obvious. Paint needs time to dry, often at least a day. It won’t get absorbed and dry on moist or humid surfaces. You will also need the mild weather conditions to start and finish the whole project on time.

Quality paint does cost more

Quality paint certainly brings you better paint quality. Take note though, as far as quality is concerned, you have to spend quite a fortune. The best paints today feature eco-friendly and side effect free components. That factor alone sets them aside from conventional paints used for residential exterior painting. It gets better with the fact that paint technology is always improving. You can easily come across brands that can guarantee you durability, better coverage and impeccable aesthetics. Do not skimp on quality in the name of saving money. The cheap brand will in the end turn out to be costly. You may have to consider repainting every now and then.

Sand and wash before you start

This is all about creating a solid surface before applying primer or undercoats. Paint hardly adheres to rough and dirty surfaces. You have to clean the siding before trimming the surface. Be sure to let the surface dry before you can begin sanding. You can then scrap any peeling paint and stubborn stains to smoothen the surface and finally paint.

Rotten surfaces need to be addressed

Rotten surfaces will waste your paint at best and deteriorate at worst. That is as far as wooden surfaces and siding are concerned. You only have two options in that regard. Wood trim with fresh components or replace the siding. For small areas, consider using wood hardeners. Then match the hardener with exterior filler products. Remember to sand the surfaces before painting.

Using a primer is essential

Any exterior painting expert will advise you to apply a decent coat of primer, sand then paint. That has always been the rule of thumb for ages. But things are changing rapidly. New paint technologies have blended primer and paint qualities. You can now have primer and paint in one product. That means you only need to clean your surface and sand before painting. Take note though, such paints are not meant to help you save money but time. They, however, look much better than conventional paints. They also last for long. Be sure to consider what their reviews have to say before going for them.

Mixing paint in large cans

This is a trick most painters know but only a few use. Mixing cans of the same paint color into sizeable containers will go a long way to ensure you have uniform color on your surfaces. The last thing you would want is a wall with three quarter’s light paint and a quarter with some other shade, distinct enough to be noticed from a few meters away. The trick is referred to as ‘boxing the paint’. Unlike the aforementioned tip, this one can help you save time and paint, which is also to say it can help you save money. It discourages waste.

Creating grit

Painted floors and porches can become slick with paint coats. So add some sand to the paint. That will go a long way to add traction. You can use play sand or go for special additives manufactured to provide you with your desired texture.

Utilize the top to bottom technique

You must have heard about it already. Paint from the top as you work your way down. It is all about letting the paint help you control streaks. The trick is to work with gravity. Not against it. Because drips and sometimes spills are inevitable, this method will allow you to reduce mishaps and mistakes in the direction you are working towards.

Prepare the location for exterior painting

Painting can be really messy. It gets worse where one wants to embark on a massive exterior painting Toronto project. So take time to cover the ground and other surfaces that can be easily stained. Cover your flowers, bushes, and outdoor furniture by using drop cloths or any other alternative within your means.